Product Support
Get help with products
Stuck on how to use one of our products?
Not sure how to clean them?
Find all the useful support information right here.
Getting Started
Do you have a question about the Tommee Tippee Quick-Cook Baby Food Maker? Find the answers here.
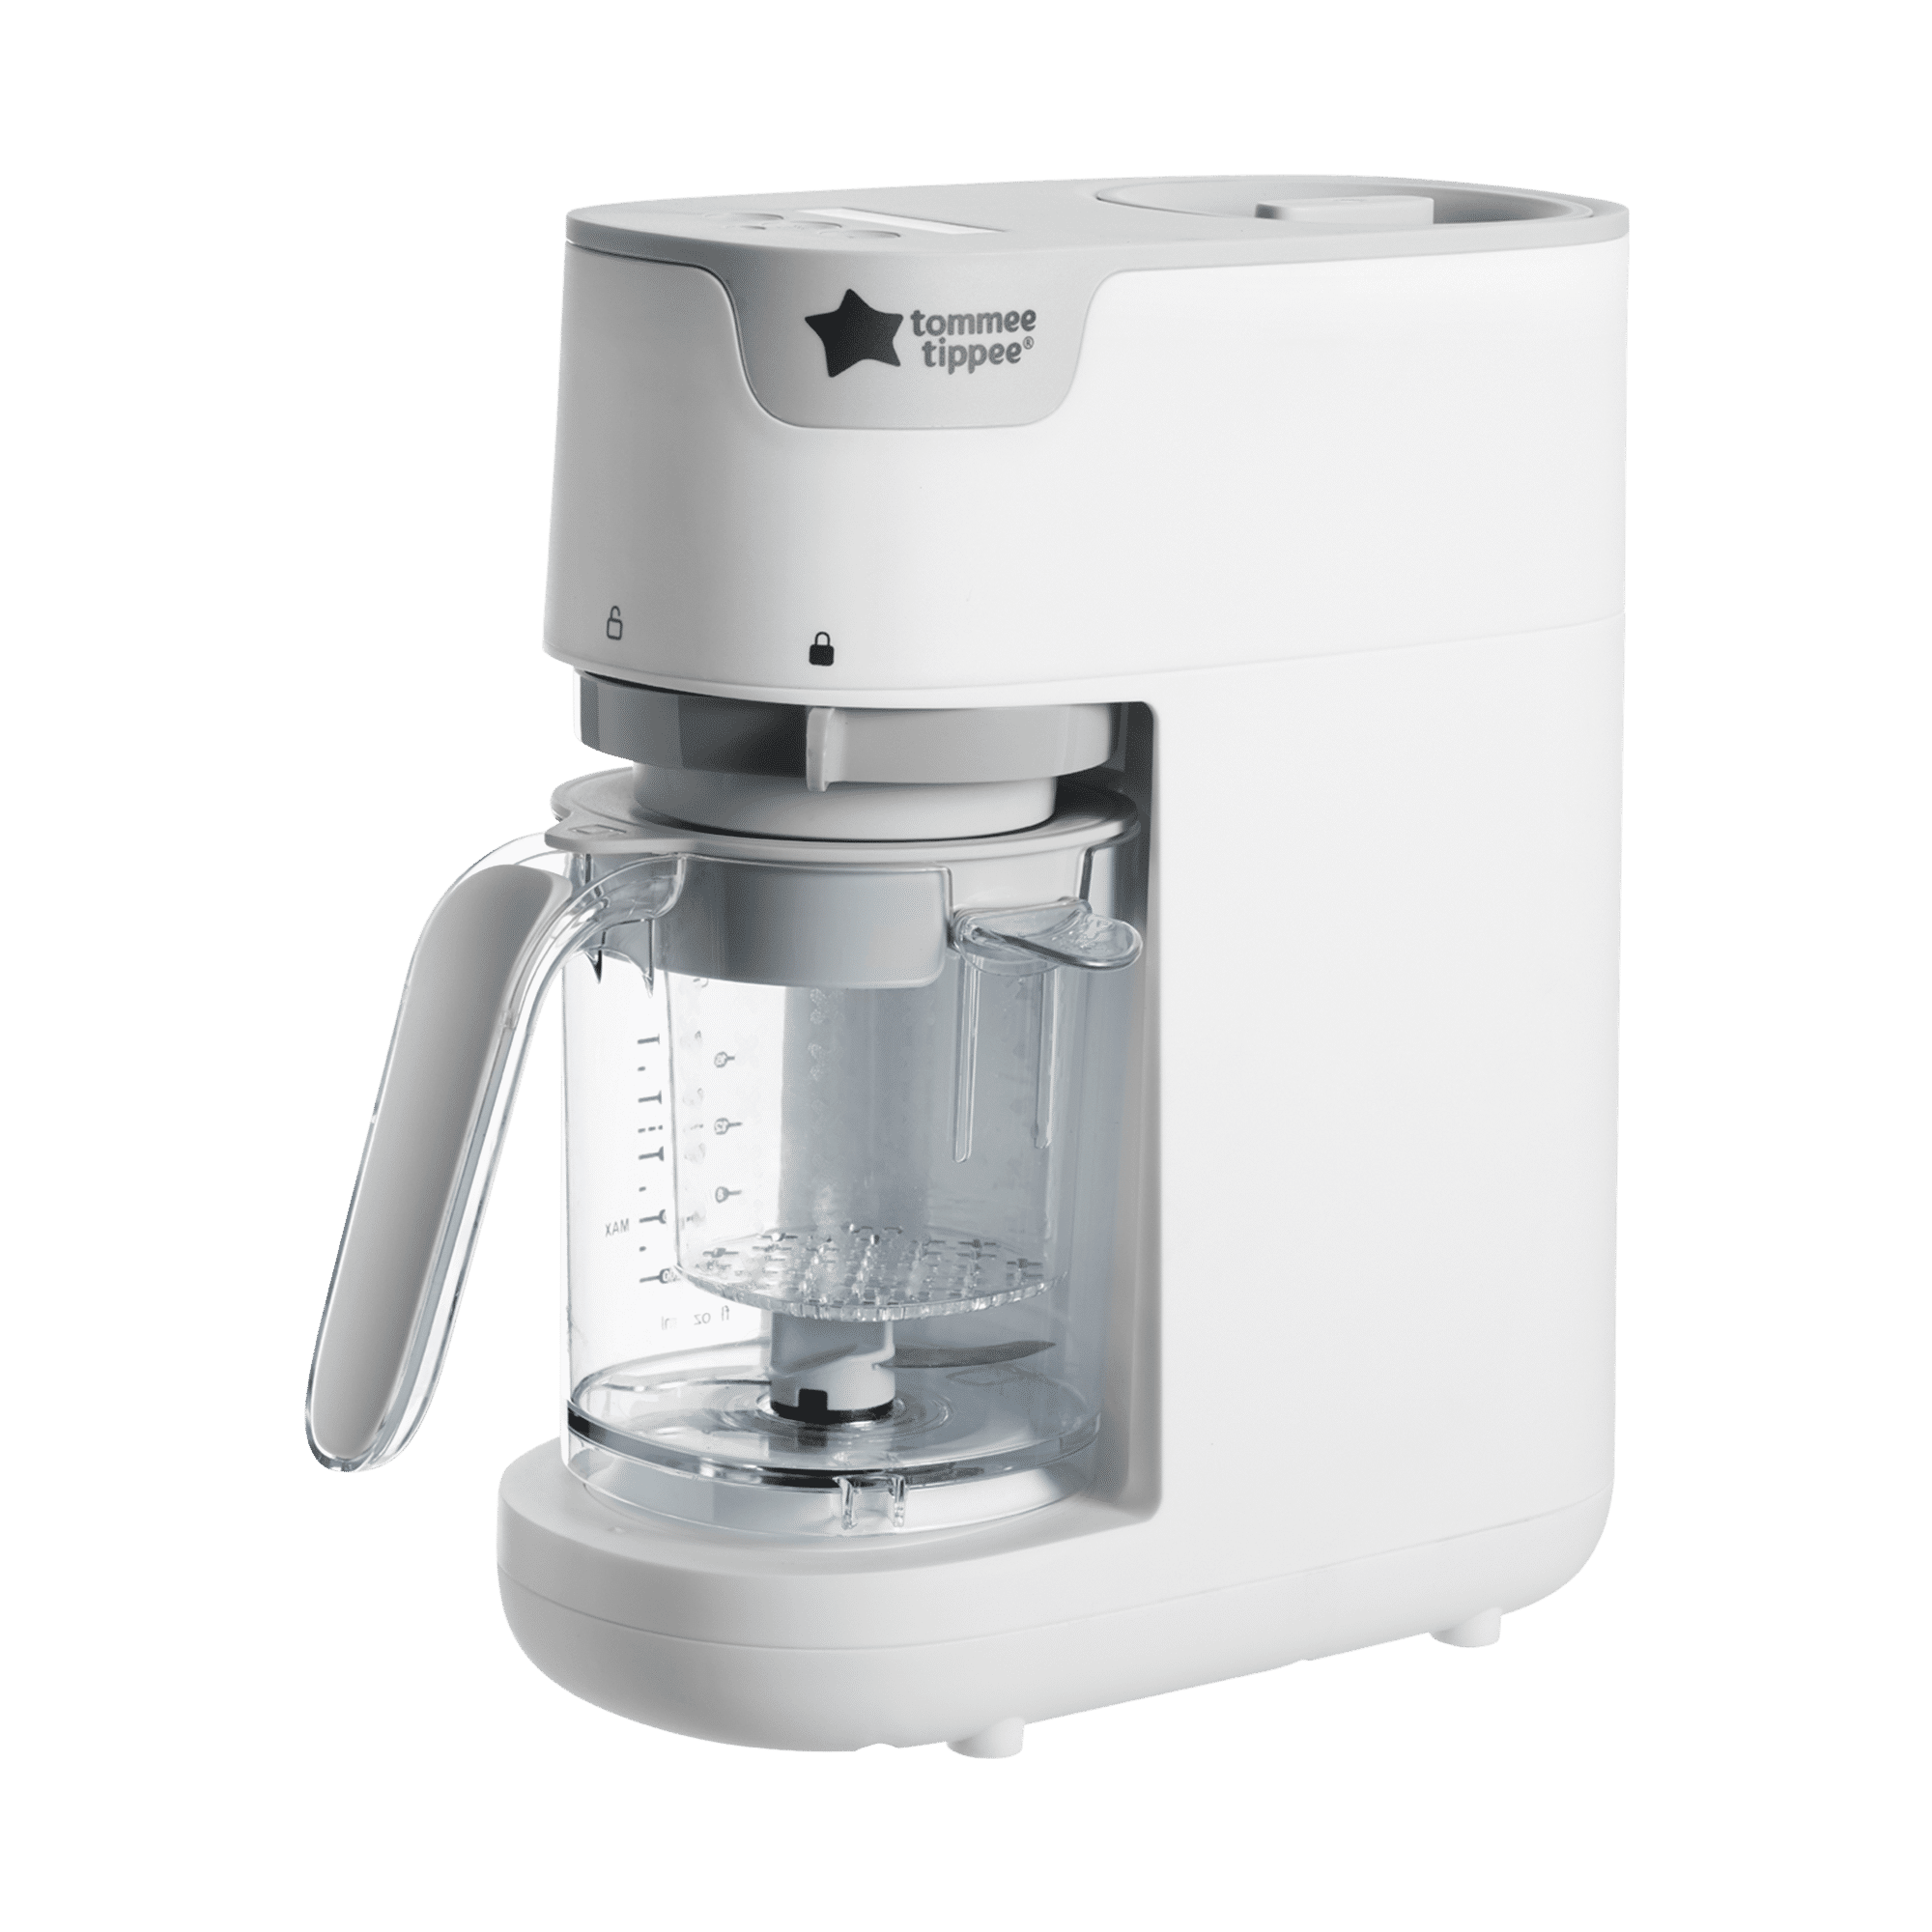
PARTS GUIDE
A step by step guide to all component parts, how they fit together and what they do.

SETTING UP YOUR QUICK-COOK BABY FOOD MAKER FOR FIRST USE:
Before using your baby food maker we recommend cleaning all the parts as follows:
WARNING! Handle the blade carefully as it is extremely sharp.
1. Remove the blade by holding the blade tab inside the unit while turning the locking ring on the bottom of the container. This will remove the locking ring and the blade will split into two parts. (Pictures 1, 2, 3).
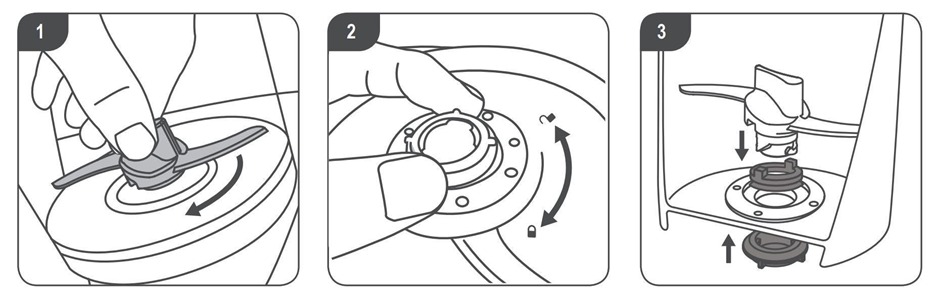
To re-assemble, reverse these steps.
2. Wash the blade, jug, basket, sealing ring and lid in soapy water then dry and reassemble. Place your baby food maker unit on a clean, dry kitchen work surface.
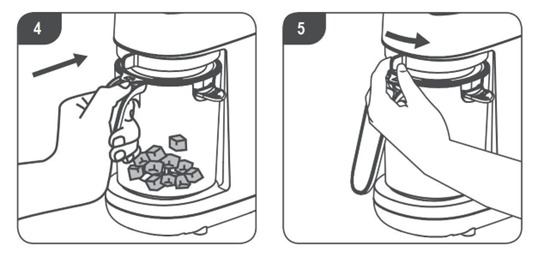
3. Place the basket inside the jug, place the lid on jug in the correct orientation and lock in place using the locking dial (Pictures 4, 5).
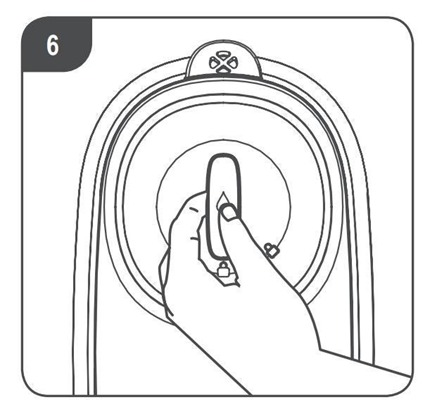
4. Unlock the water tank by rotating the lid anti-clockwise. Fill the water tank with 350ml of cold water, replace the cap and lock it in place (Picture 6). Make sure that the water level is not filled above the inside edge of the water tank.
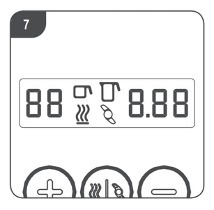
5. Plug your baby food maker into a mains power supply and turn on the power. Press the start button to turn on the unit and the LCD display will illuminate (Picture 7).
6. Set the steam time to 30 mintues using the + buttons (Pictures 8, 10)

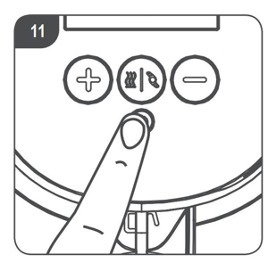
7. Press the start button to start (Picture 11).
The unit will now run the steam cycle automatically.
8. When the cycle has finished, your baby food maker will beep and the LCD display will turn off. Turn off the power supply, unplug your baby food maker and allow it to cool completely. Unlock the jug and pour away any residual water.
9. Clean the jug and steamer basket following the cleaning instructions.
10. Pour away any remaining water from the water tank by tipping the unit sideways over a sink. Wipe your baby food maker clean and dry and it's now ready to use.
Using Your Machine
USING YOUR MACHINE
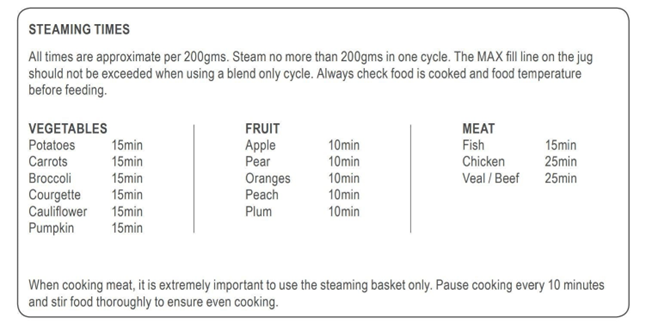
For your child's safety always check food temperature before feeding. Your Baby Food Maker can steam and blend vegetables, fruits (peeled and cored/pips removed), meats and fish (with bones removed). You must cut all food into approximately 1-2cm cubes before placing it into the jug or basket for cooking. For cooking times see below. For recipes visit tommeetippee.com.
During the steaming process hot steam passes through the vent at the back of your Baby Food Maker, so position it away from walls and make sure it is not underneath any overhanging shelves or cabinets.
1. Place your Baby Food Maker on a flat dry kitchen work surface. Place the jug or basket with diced food into the base (picture 4) and lock in place using the locking dial (picture 5). Steam no more than 200 grams in one cycle. Fill the water tank with 350ml of cold water and replace the cap (Picture 6).
2. Plug your Baby Food Maker into a mains power supply. The unit will beep. Press the start button to turn it on. The LCD display will light up.
TO SET AN AUTOMATIC STEAM TO BLEND CYCLE
1. Use the jug with no basket and make sure the lid is in the correct orientation.
2. Press the mode button and choose the steam option. Set the steam time using the +/- buttons for a maximum steam time of 30 minutes.
3. Press the mode button and choose the blend option. Set the blend time using the +/- buttons for a maximum blend time of 2 minutes.
4. Press the start button to start. Your Baby Food Maker will now run the steam and blend cycle automatically.
5. When cooking meat, it is extremely important to pause the unit every 10 minutes and stir thoroughly. This is to ensure even cooking
When setting the automatic steam and blend cycle, the blades will rotate once every 2 minutes to move food around the container.
TO SET A STEAM ONLY CYCLE
If you’re steaming food, we recommend that you use the basket, especially if you want to make meals with a chunkier texture.
Please make sure the lid is in the correct orientation.
To steam without the basket
1. Press the mode button and choose the steam option. Set the steam time using the +/- buttons for a maximum steam time of 30 minutes.
2. Press the start button to start. It will now run a steam cycle.
To steam with the basket
1. Set the steam time using the +/- buttons for a maximum steam time of 30 minutes.
2. Press the start button to start. The unit will now run a steam cycle.
To set a blend only cycle
1. Add food to the jug without the basket in place. Make sure the lid is in the correct orientation.
2. Press the mode button and choose the blend option. Set the blend time using the +/- buttons for a maximum blend time of 2 minutes.
3. Press the start button to start. The unit will now run a blend cycle.
To pulse the action
You can set a pulse action during blending to help you control the texture of the food.
1. Press the start button, then mode and choose the blend only option.
2. Select the time (using 5 second intervals) and press start. The unit will pulse once.
3. Repeat the above process for a further pulse.
To steam and blend using the basket
Using the basket to steam food before blending reduces the amount of water in the food and makes it easier to achieve a chunky texture.
1. Place food chopped into approximately 1-2cm cubes in the steamer basket and make sure that the lip of the basket is resting in place on the edge of the jug. Make sure the lid is in the correct orientation.
2. Set the steam time using the +/- buttons for a maximum steam time of 30 minutes.
3. Press the start button to start. The unit will now run a steam cycle.
4. Wait for the steam basket to cool, unclip the lock and remove from the unit.
5. Pour away any water from the jug then transfer the steamed food into the jug.
6. Make sure you change the orientation of the lid orientation to show that the food is now in the jug.
7. Press the mode button and choose the blend option. Set the blend time using the +/- buttons for a maximum blend time of 2 minutes.
8. Press the start button to start. The unit will now start a blend cycle. When the cycle has finished the unit will beep and the LCD display will turn off.
9. Leave the unit to stand for 2 mins before unlocking the jug and serving up the food.
10. Take care when removing the jug and lid as steam may still be present and the jug may be hot to touch.
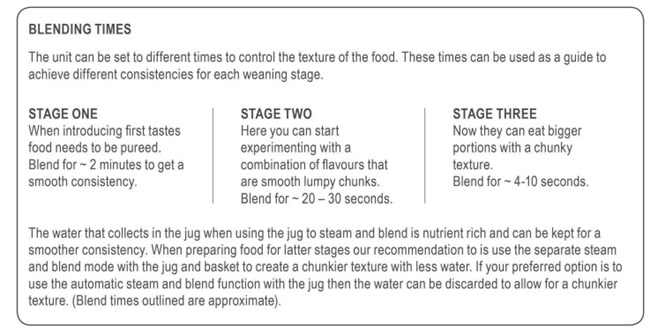
When you’re steaming food, water will collect in the jug. In stage 1 weaning, where food consistency should be a smooth puree we recommend that you stir in this nutrient rich water.
In later weaning stages, when you want food with a thicker texture, we recommend removing some or all of this water depending on your baby’s preference.
To pause your Baby Food Maker while cooking
To pause cooking mid cycle, press and hold the mode button for three seconds until your Baby Food Maker beeps. The LCD will flash.
This will pause the cycle indefinitely.
You can remove the jug while cooking is paused, but it will be hot, so wait until it is cool.
Press the start button to continue the cycle.
To cancel
To stop steaming or blending mid cycle, press the start button for three seconds until your Baby Food Maker turns off.
Smart Memory Function
If you want to use the Baby Food Maker again within 30 minutes, press the start button to switch it on, then press and hold ‘+’ and ‘-‘ button at the same time. Press the start button again and it will repeat the last cycle.
Please note that the smart memory function cannot be used with steam and blend with basket.
When you've finished using your Baby Food Maker
Turn your Baby Food Maker off at the power supply and unplug it. Carefully disassemble the blade from the jug and wash all parts in warm soapy water.
If you want to prepare another batch of food straight away, make sure that you top up the water tank. You must wait for the unit to cool before topping up the water tank.
Steaming and blending guide